Welcome to the vulnman documentation.
This is the multi-page printable view of this section. Click here to print.
Documentation
- 1: Glossary
- 2: Getting Started
- 2.1: Introduction
- 2.2: Install Vulnman Server
- 2.3: Configuration
- 2.4: Updating Vulnman Server
- 2.5: Issue Tracking
- 3: User Guide
- 3.1: Introducing the Web Interface
- 3.2: Generate Reports
- 3.3: Using The Responsible Disclosure Application
- 4: Advanced Topics
- 4.1: LDAP Authentication
- 4.2: Permissions in Vulnman
- 4.3: Custom Report Templates
- 4.4: Vulnerability Templates
- 5: Contribution Guidelines
1 - Glossary
Vulnman consists of several components. These are presented in this section.
The Vulnman Server is the core component. This provides a REST API and a web interface for easy management of pentest assets during a penetration test.
Core
Vulnman introduces different components that you will see in the web interface or external tools. The components are explained below.
Client: Clients are the customers of your projects. Client contact information provided can be added to the pentest report.
Project: A project is the container of your assessment. It contains all tested assets, findings and reports.
Assets: Vulnman supports multiple assets that can be created through the REST-API or through the web interface. The following assets are supported:
- Service
- Host
- Web Application
- Web Request
Vulnerability Templates: Vulnerability templates are managed using a separate repository. This allows other external tools to introduce these templates too. These templates are used to derive basic information for your found vulnerabilities.
Vulnerability: A vulnerability is a security flaw that you found during the project. Vulnerabilities have a template. The default severity is inherited from the template but can be overwritten for each vulnerability.
1.1 - Responsible Disclosure Application
To Be Done
2 - Getting Started
After downloading and install Vulnman, it’s time to dive in and get to work!
The Basics
Vulnman consists of 2 components, the vulnman-server and vulnman-scanner. You can use the vulnman-server without the scanner component.
Further components and wordings are described in the glossary.
Documentation
The documentation mainly focuses on the following sections:
If you want to improve the documentation, have a look at the Improve Documentation page.
2.1 - Introduction
What is Vulnman?
Vulnman is a free and open-source pentest management and collaboration software. Manage your pentest projects and their related assets using the Vulnman web interface. Vulnman comes with a simple to use report generator. Once you have created your templates, the pentesters can create new reports with just a few clicks. This allows the pentesters to focus on finding vulnerabilities.
It is built using the powerful Django Framework.
Features
Unlimited Users and Projects
Despite other solutions, vulnman does not limit the amount of users or projects.
Report Generator
Vulnman contains a simple to use pentest report generator. After you have created your report template(s), you can create new reports with a few clicks. You will never have to struggle with Word documents again.
Customizable
Vulnman can be customized at multiple places. Some of them are the Report Template and Vulnerability Templates.
Markdown Syntax
Vulnman allows you to write your texts in markdown (mostly).
Vulnerability Management
Vulnman includes simple features to manage vulnerabilities of your projects. This includes Vulnerability Templates and different vulnerability scoring like CVSS.
Open-Source
Vulnman is fully open-source software. It is free to use.
Responsible Disclosure
Vulnman integrates features to support bug hunters during the responsible disclosure process. Share vulnerabilities discovered in third party software to their vendor, export advisories and more.
Multi Language Support
By default, vulnmans report and vulnerabilities are tracked in english. However, you can easily configure it to use your language.
REST-API
The REST-API is work in progress!
More information
This page is just a brief introduction to what Vulnman is all about, and many technical details have been omitted here for the sake of presentation.
- If you're a current or potential Vulnman user, you may want to check out the documentation.
- If you're a developer, there's dedicated developer documentation.
- Need help, or just want to join the conversation? Learn more about help, support, and the community.
2.2 - Install Vulnman Server
Welcome to the vulnman installation guide! This guide will walk you through the process of installing vulnman.
Install Server
Create User
Since we do not want to run vulnman as root, we create a new user.
useradd -m vulnman
Install Dependencies
Debian
apt install git python3-pip nginx
Get Code
cd /opt
git clone https://github.com/vulnman/vulnman.git
cd vulnman/
chown vulnman:vulnman -R .
Install Requirements
Before we start to deploy vulnman, we need to install some dependencies.
pip install -r requirements.txt
Configure Vulnman
su - vulnman
cd /opt/vulnman
cp local_settings.template.py vulnman/conf/local_settings.py
exit
You may want to read how to configure your installation.
Setup Database (optionally)
This is an optional step, which depends on your setup and configuration. For example, if you plan to use a sqlite database, you do not need to do anything from this section.
PostgreSQL
To Be Done
Initializing Vulnman
In the next step, we need to initialize vulnman.
su - vulnman
cd /opt/vulnman
python manage.py migrate
python manage.py collectstatic
python manage.py createupseruser
exit
Systemd Service
If you want to run the vulnman-server using systemd, you can paste the following
content into the /etc/systemd/system/vulnman-server.service file.
[Unit]
Description=vulnman server
After=network.target

[Service]
User=vulnman
Group=vulnman
WorkingDirectory=/opt/vulnman
ExecStart=gunicorn --bind 127.0.0.1:8000 vulnman.wsgi

[Install]
WantedBy=multi-user.target
To enable the service on boot and start the vulnman service, you can use the following commands:
systemctl start vulnman-server
systemctl enable vulnman-server
For the qcluster which is for example used to create the reports, create a file /etc/systemd/system/vulnman-qcluster.service file.
[Unit]
Description=vulnman server
After=network.target

[Service]
User=vulnman
Group=vulnman
WorkingDirectory=/opt/vulnman
ExecStart=python3 manage.py qcluster

[Install]
WantedBy=multi-user.target
systemctl start vulnman-qcluster
systemctl enable vulnman-qcluster
Setup Nginx
Paste the following content into the /etc/nginx/conf.d/vulnman.conf file.
You may want to further hardening the TLS configuration, which is not part of this guide.
server {
    listen 80 default_server;
    server_tokens off;
    return 301 https://$host$request_uri;
}

server {
    listen 443 ssl;
    server_name _;
    server_tokens off;

    ssl_certificate /etc/ssl/yourcert.crt;
    ssl_certificate_key /etc/ssl/yourcertkey.key;

    ssl_protocols TLSv1.3;
    ssl_prefer_server_ciphers on;
    ssl_ciphers ECDH+AESGCM:ECDH+AES256:ECDH+AES128:DH+3DES:!ADH:!AECDH:!MD5;

    location / {
        proxy_pass http://127.0.0.1:8000;
        proxy_set_header X-Forwarded-For $proxy_add_x_forwarded_for;
	proxy_set_header Host $host;
    }
    location /static/ {
        alias /opt/vulnman/static_files/;
    }

    location /uploads/ {
        alias /opt/vulnman/uploads/;
    }

    add_header X-XSS-Protection '1; mode=block';
    add_header Strict-Transport-Security "max-age=31536000; includeSubDomains" always;
    add_header Referer-Policy 'strict-origin';
    add_header X-Frame-Options 'SAMEORIGIN';
    add_header X-Content-Type-Options 'nosniff';
}
Import Default Templates (optionally)
If you want to use our (currently quite small) default templates, run the following command:
su - vulnman
cd /opt/vulnman
python3 manage.py import_vulnerability_templates vulnman_default_templates
exit
2.3 - Configuration
Have a look at the local_settings.template.py file for a more complete and commented example.
Database
PostgreSQL
DATABASES = {
  'default': {
    'ENGINE': 'django.db.backends.postgresql',
    'HOST': 'db',
    'NAME': 'vulnman',
    'USER': 'vulnman_db_user',
    'PASSWORD': 'dontusethispassword',
  }
}
EMAIL_BACKEND = 'django.core.mail.backends.smtp.EmailBackend'
EMAIL_HOST = "smtp.example.com"
EMAIL_PORT = 587
EMAIL_USE_TLS = True
EMAIL_HOST_USER = 'jdoe'
EMAIL_HOST_PASSWORD = 'changme'
DEFAULT_FROM_EMAIL = "jdoe@example.com"
Responsible Disclosure Application
RESPONSIBLE_DISCLOSURE_MAIL_FROM = "responsible-disclosure@example.com"
RESPONSIBLE_DISCLOSURE_VULNERABILITY_ID_PREFIX = "vulnman-"
# Amount of days for the planned publication of the vulnerability details
RESPONSIBLE_DISCLOSURE_PLANNED_PUBLICATION_INTERVAL = 60

# Templates that just provide advisory templates and not a report template
RESPONSIBLE_DISCLOSURE_ADVISORY_TEMPLATES = {
   "myadvisory": "my_ext.advisory.MyAdvisory"
}
2.4 - Updating Vulnman Server
cd /opt/vulnman
git pull
pip install -r requirements.txt
python3 manage.py migrate
python3 manage.py collectstatic
2.5 - Issue Tracking
To Be Done
3 - User Guide
To Be Done
3.1 - Introducing the Web Interface
The web interface allows you to manage your pentest and its assets using a user interface.
You can visit the vulnman server by opening your instance from within your browser. The application needs you to be logged in.
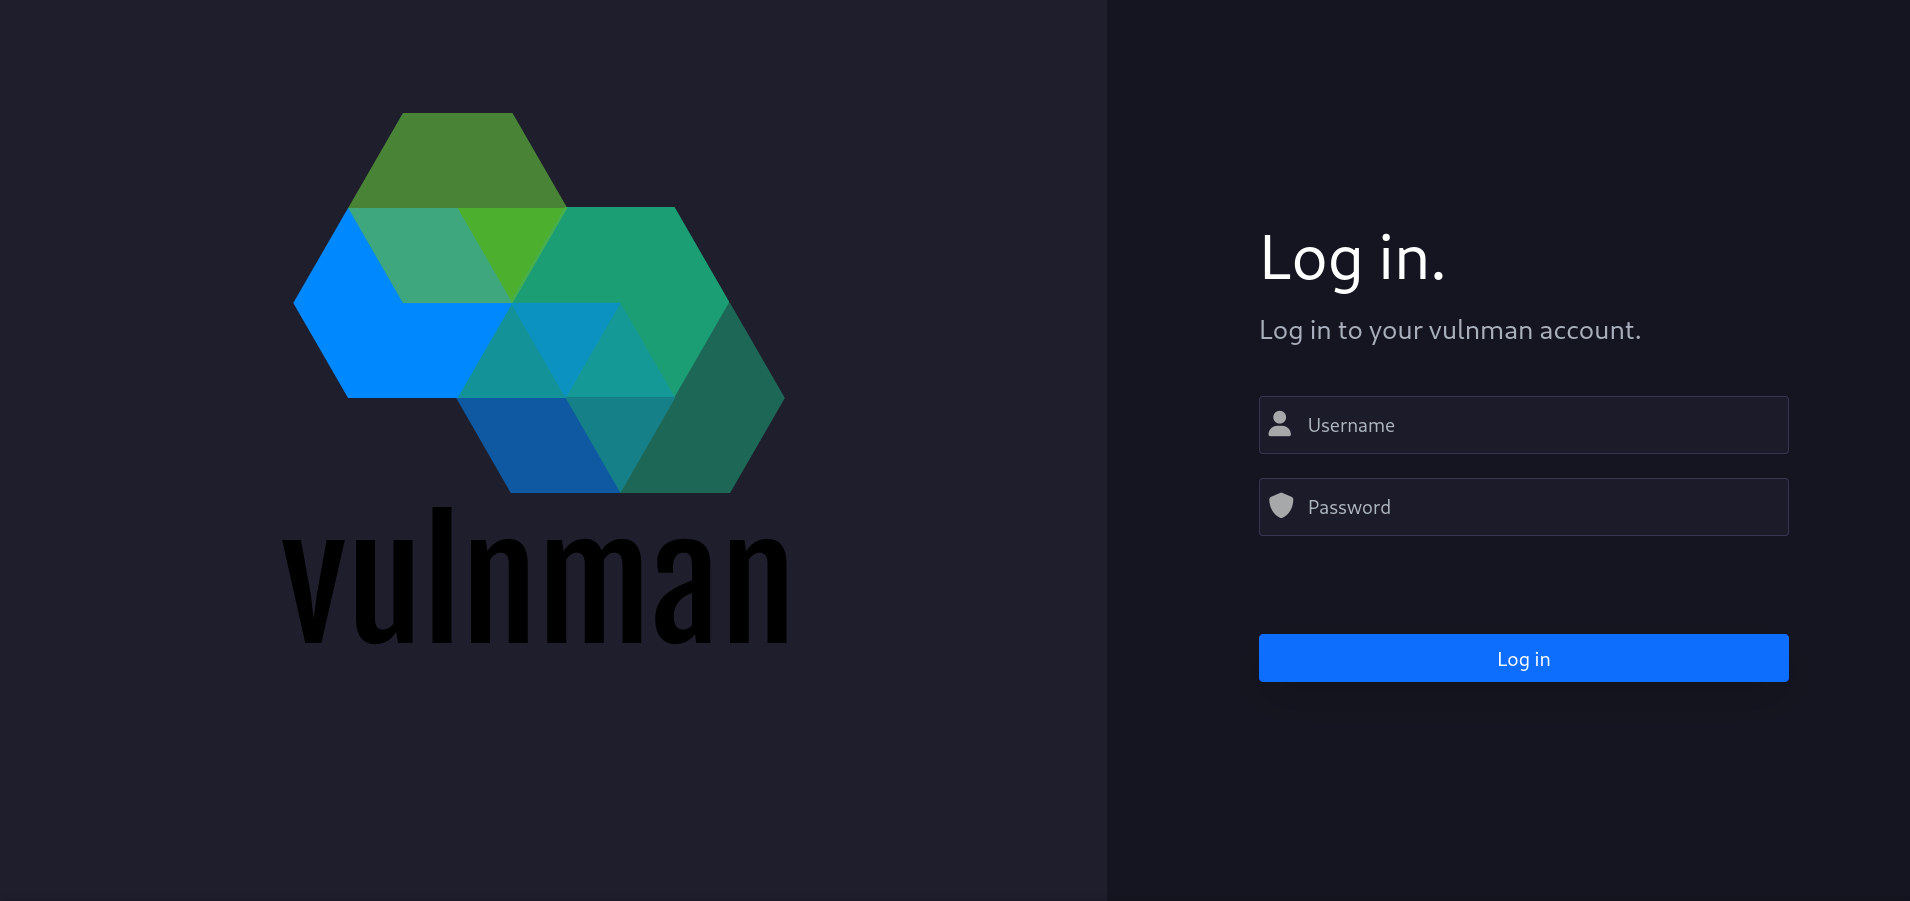
After you logged in, you will be redirected to the list of your current (non archived) projects. By clicking on one of the projects, you are able to activate the project and see its details and do your work.
Project Dashboard
The project dashboard is the home of your project. It gives you a short overview about the state of your project.
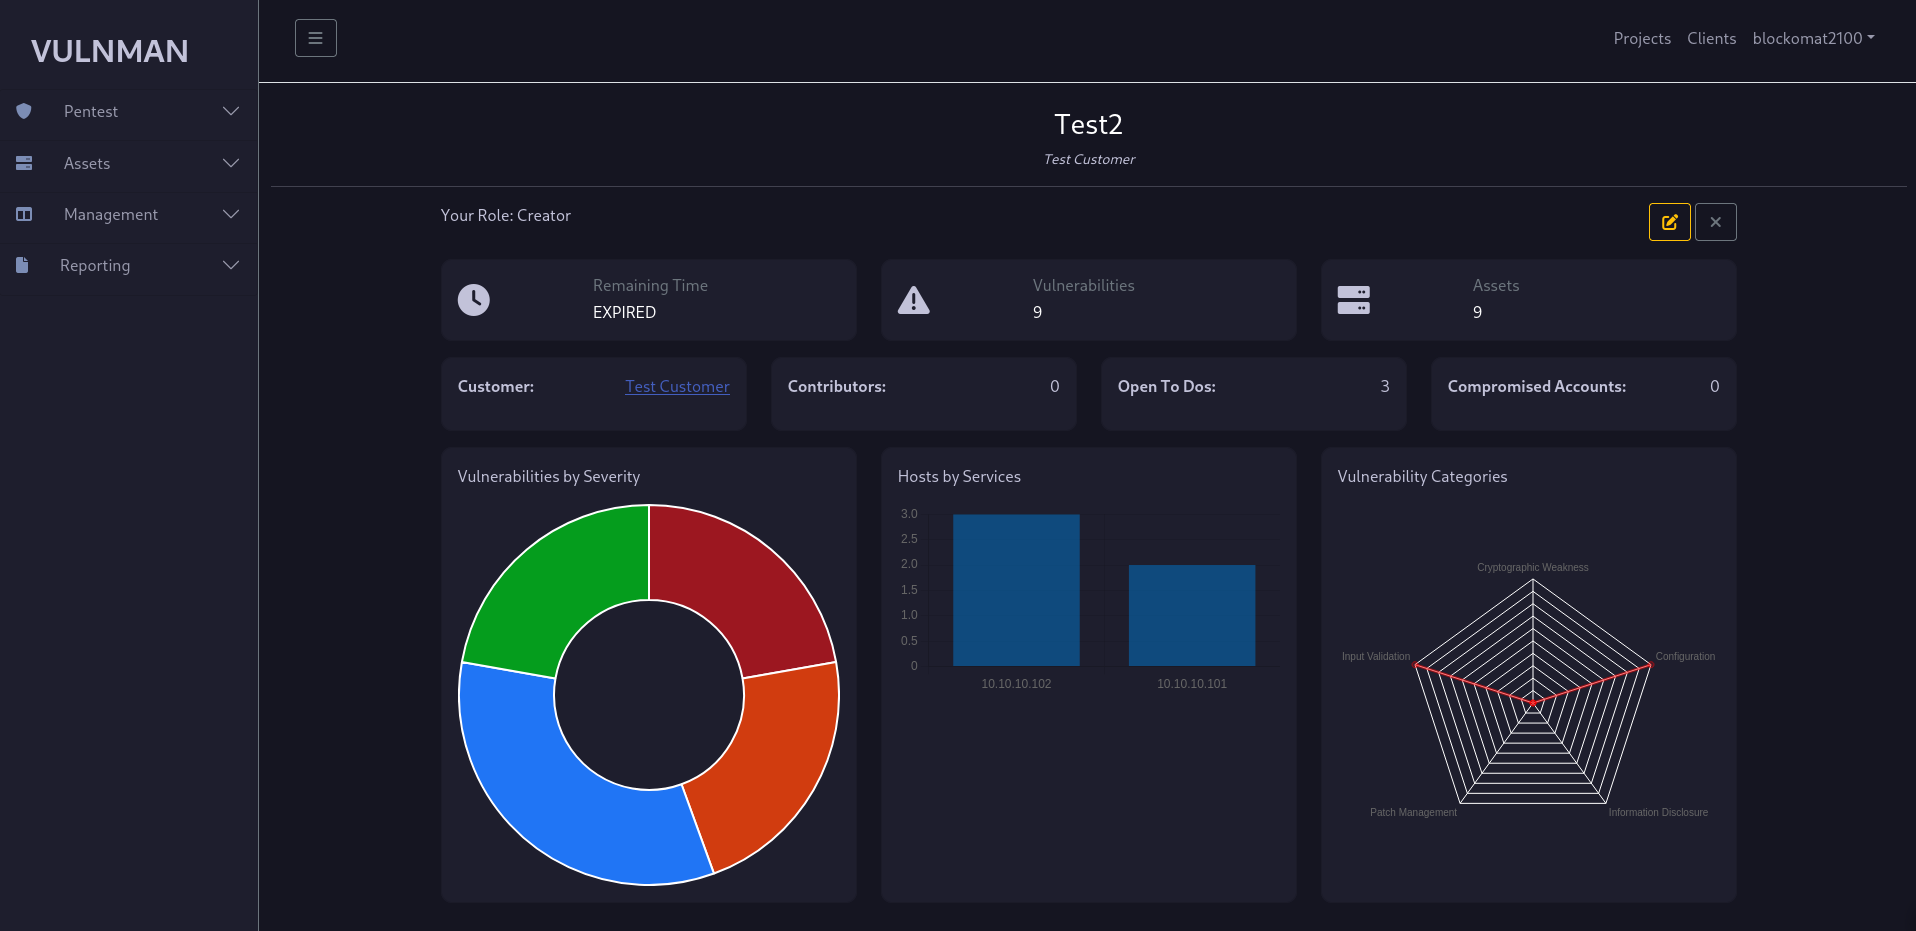
It contains the remaining time for the project, different counts like how many vulnerabilities were found and open to dos are left.
You can close the project through the X button.
Closing a project makes it read-only.
If for some reasons you forgot your role in the project, you can found it here - in the top left of the dashboard.
A sidebar will be available with project related actions.
The Sidebar
The sidebar only contains project related links, while the top bar include global links. The sidebar is devided into different categories.
Pentest:
The pentest group contains links to your project’s dashboard, vulnerabilities, tasks, user accounts and project tokens.
Assets:
In this group you can create and manage your assets.
Management:
This group handels links to manage the project. Currently there is just one item in here, which allows you to add or remove contributors. It is important to know, that you need permissions to do so. By default, the project creator user will be able to remove or add contributors.
Reporting:
Here you can create new reports or download existing one. You can write the management summary here.
3.2 - Generate Reports
The reports in vulnman are generated from templates.
A simple default template is included, but you may want to customize it to make it yours. The default template is quite minimalistic, since in most cases a custom one would be used anyway.
Report List
You can have multiple reports for your projects, in case your customer wants to have for example an english, and a german report.

New Reports
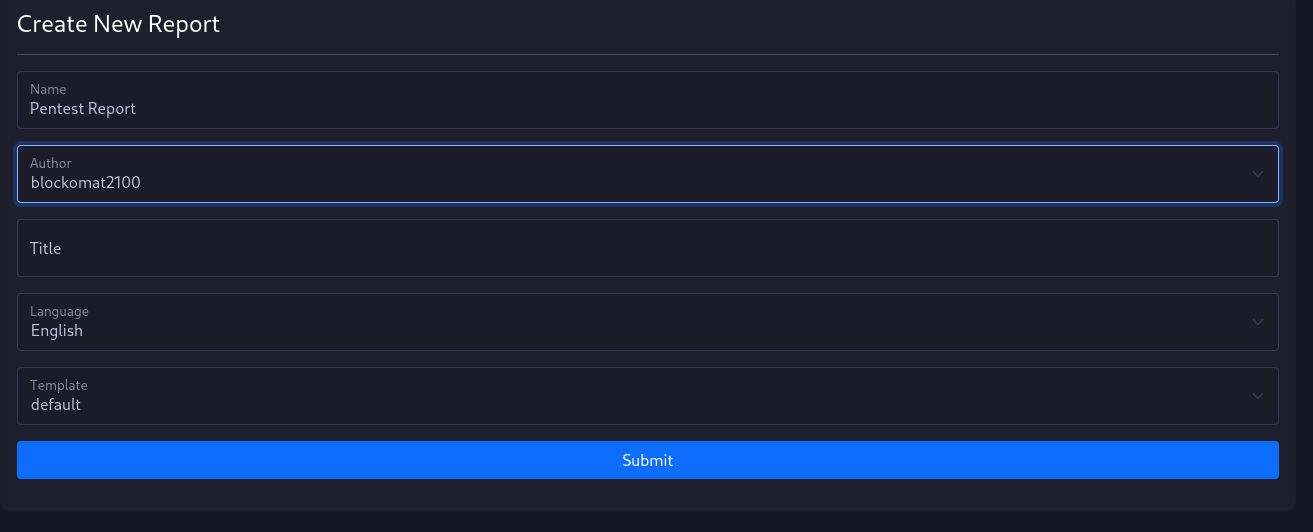
To create a new report, you need to give vulnman some information about the report.
The name is just for internal purposes and is displayed in the report list.
The author of the report is displayed in the report.
The title field is optional and can be used to overwrite the default report title.
You can also choose a report template and language.
The Report
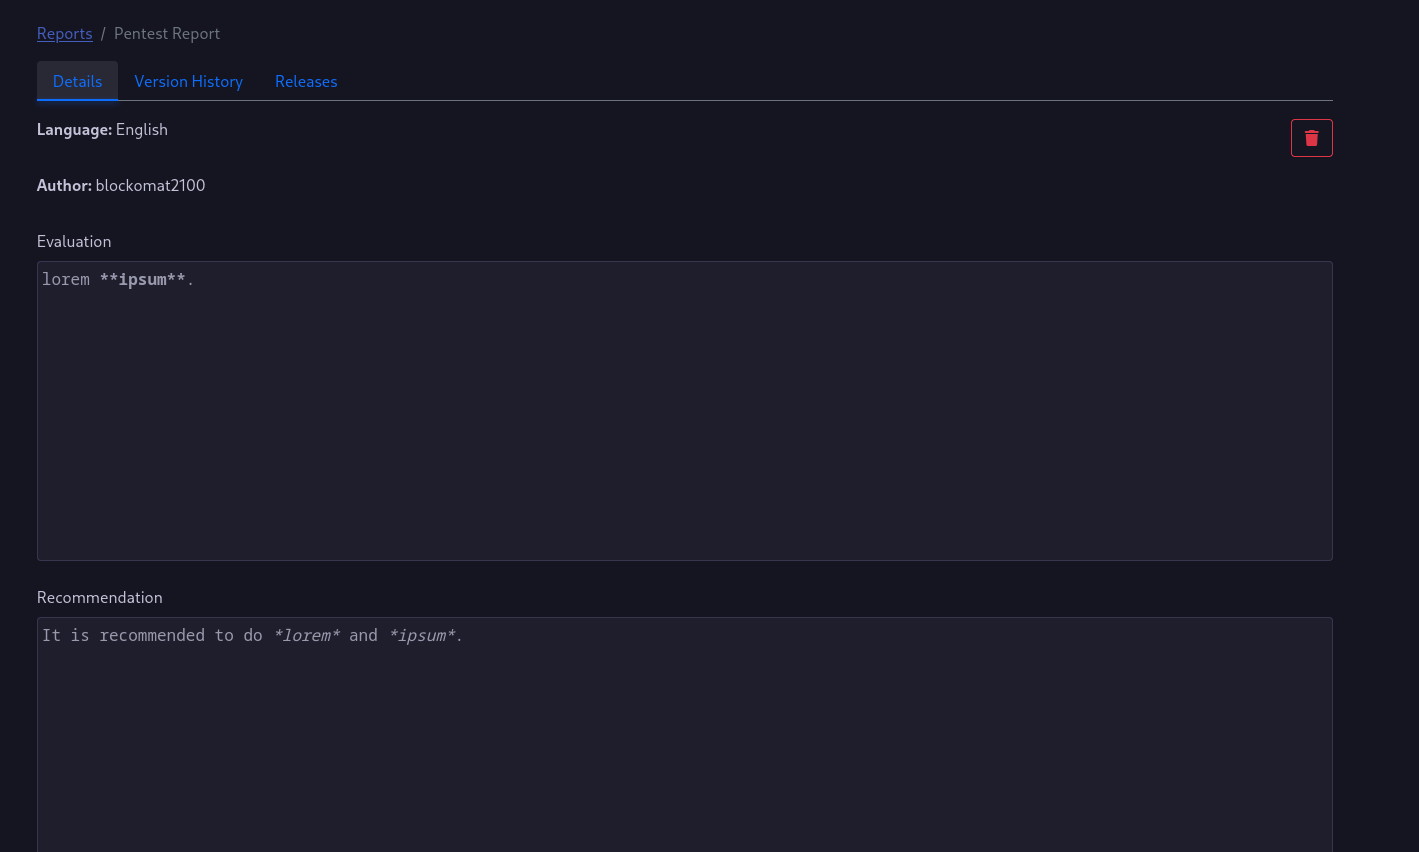
The report requires you to write a management summary using the Evaluation and Recommendation fields.
Both fields will send a request to the API once you remove the focus of the fields and the content will be stored in the database.
Report Releases
A report release is a fixed state of the report. Once you create a report release the report generator will use the most current information and generates the report. If you add new vulnerabilities or edit the management summary, you need to create a new report release.

Note: There is currently no status indicator of the build process. Depending on the project size, the generation may need some time.
After the report is created, you can click the download button to receive the generated PDF report.
Report releases can have different types.
The draft contains a watermark which indicates, that this report is actually a draft report.
The release does not have a watermark.
3.3 - Using The Responsible Disclosure Application
Vulnerability Listing
Visiting the Responsible Disclosure Application opens up your list of vulnerabilities.
This list contains all vulnerabilities that you have created or that have been shared with you.
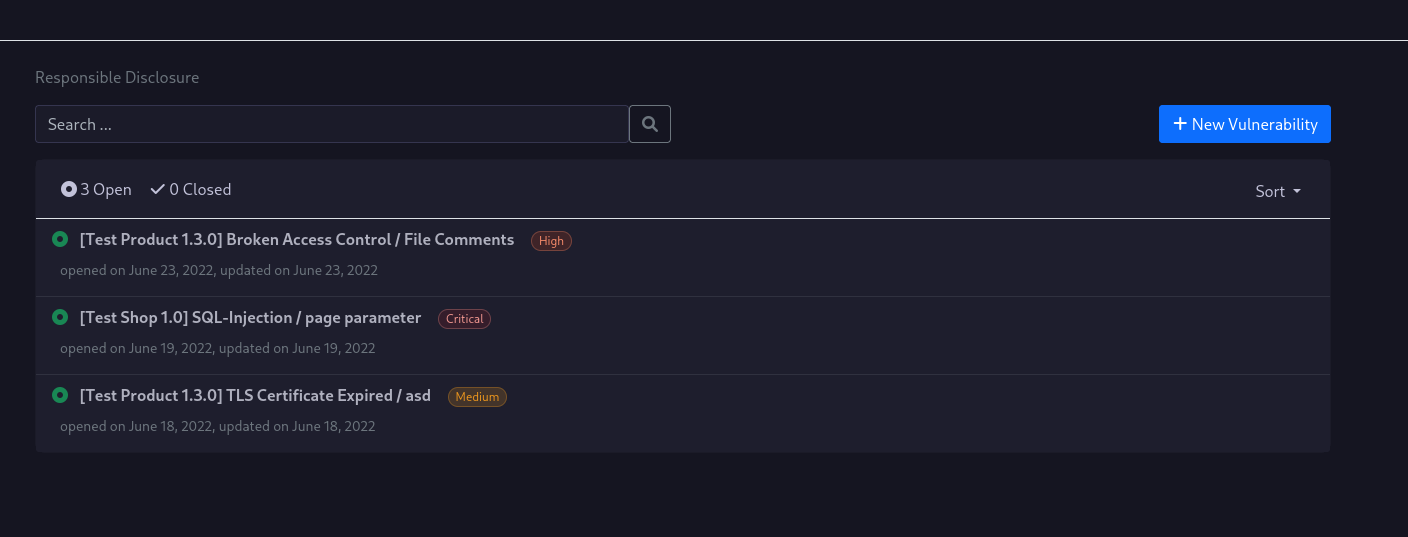
The default view is to show only open findings, while you can easily view closed ones by clicking the corresponding button.
Vulnerability Details
If you click on one of the vulnerabilities in your list, you will see a screen similiar to the one below.
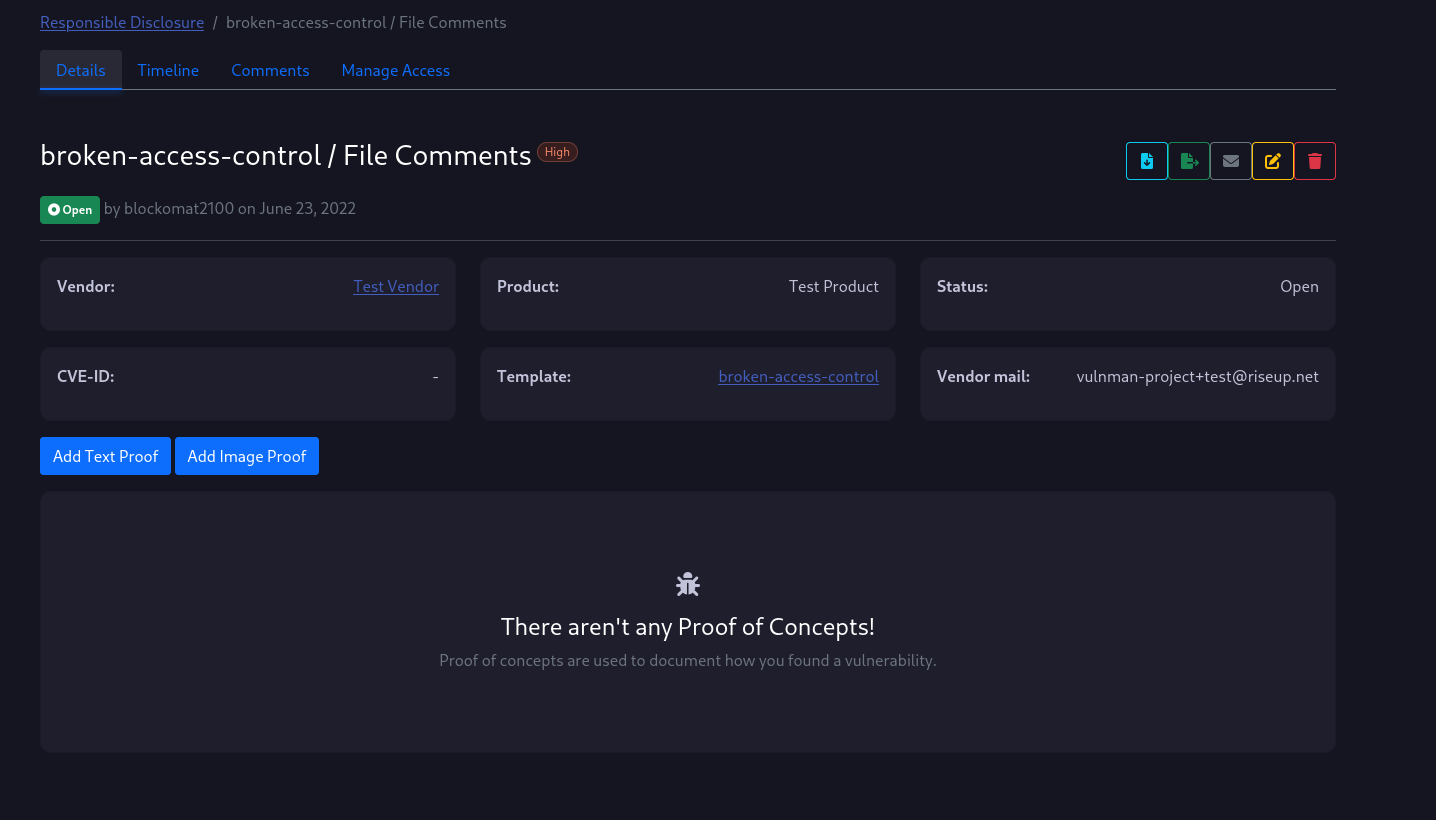
A second navigatation bar appears which contains pages related to the vulnerability including a disclosure timeline, comments and access management.
If you have permissions to change the vulnerability you will find some buttons on the right to manage the vulnerability.
The buttons have the following functionality (from left to right):
- Download the vulnerability details as a PDF report
- Export the vulnerability details as a Markdown advisory
- Notify vendor by mail, with PDF report attached (Warning: The mail will be send unencrypted. PGP or other encryption is not yet supported!)
- Edit the vulnerability details
- Delete the vulnerability
In the bottom half of the page, you see two more buttons for adding new proofs to the vulnerability.
Proofs
To create a new proof, just click on one of the buttons.
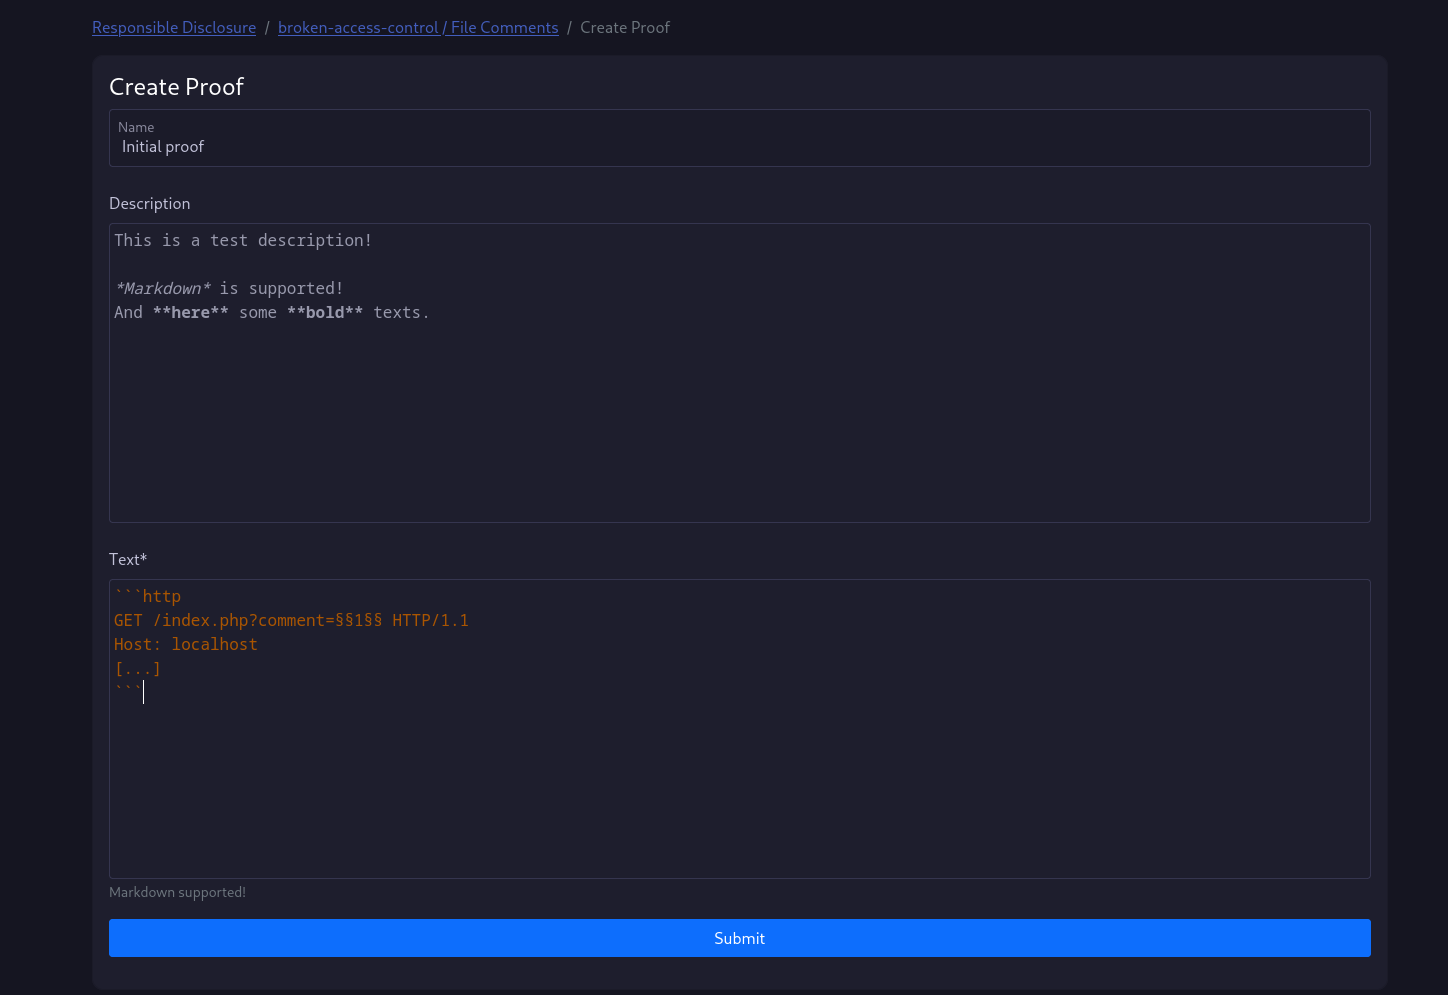
As you can see in the screenshot, you can use markdown.
You can highlight specific parts of a codeblock with §§highlighted$$.
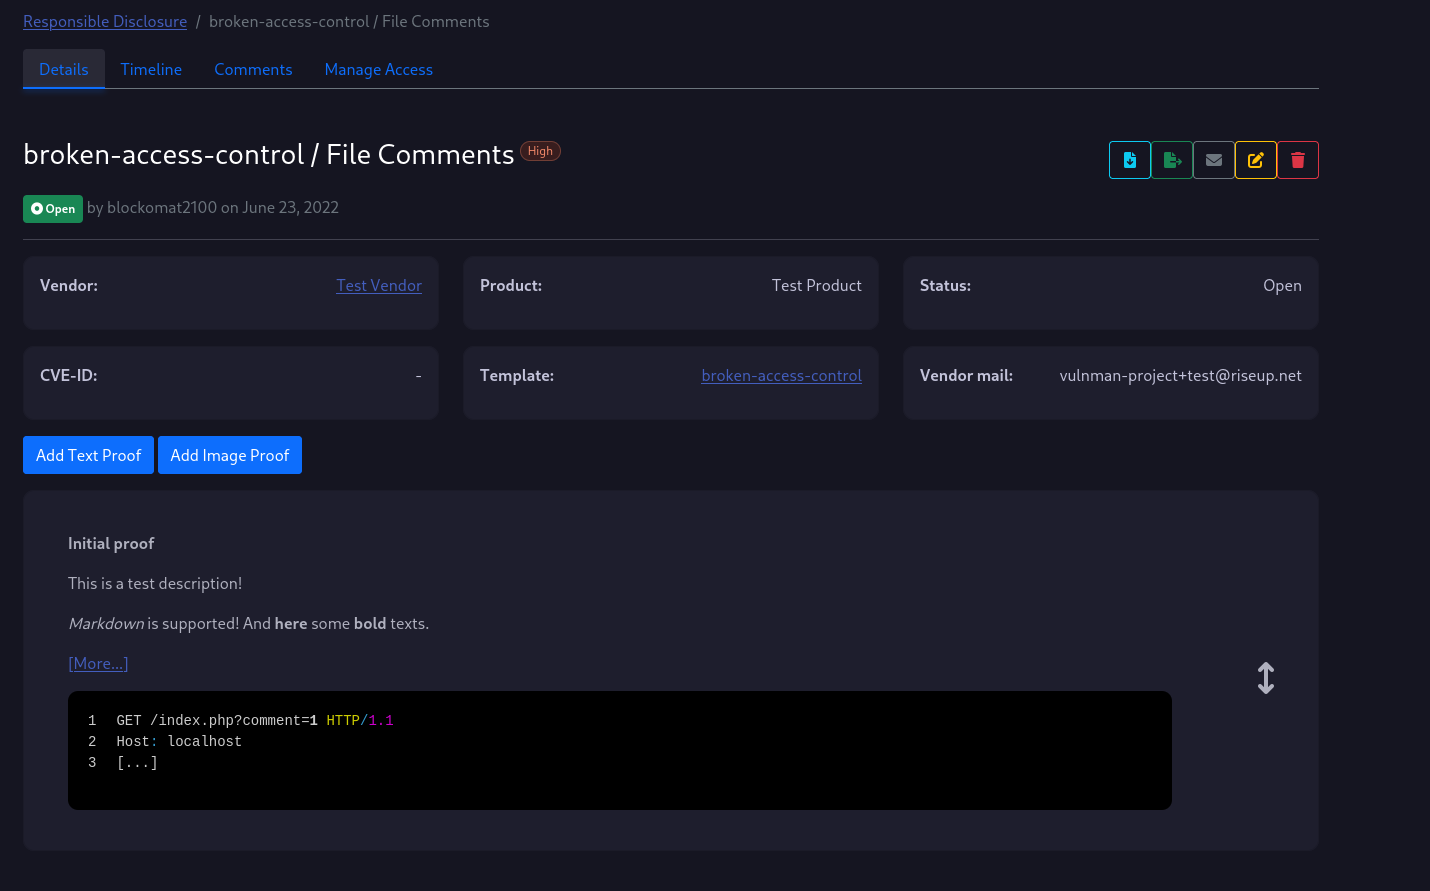
If you have created the proof, the proof will appear on the vulnerability details page as shown below.
Timeline
The timeline allows you and the vendor to track the process of the disclosure process.
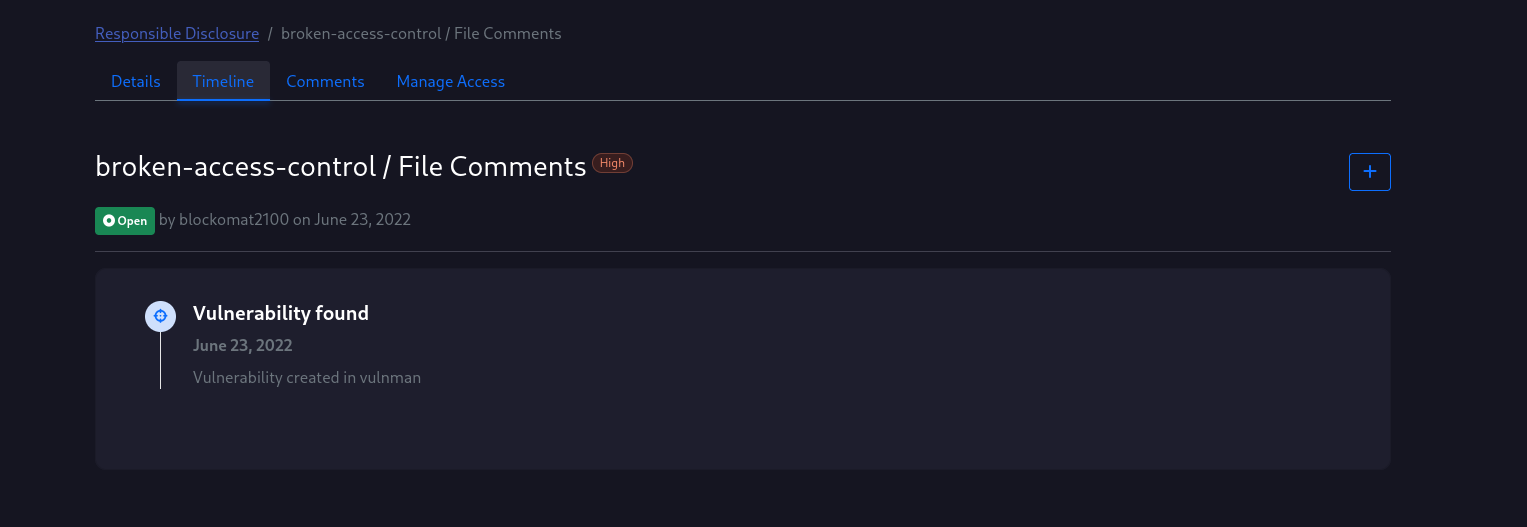
You can create new events using the button on the right corner.
Comments
If you shared the vulnerability with a user, you can use the comment feature to discuss further things about the disclosure process.
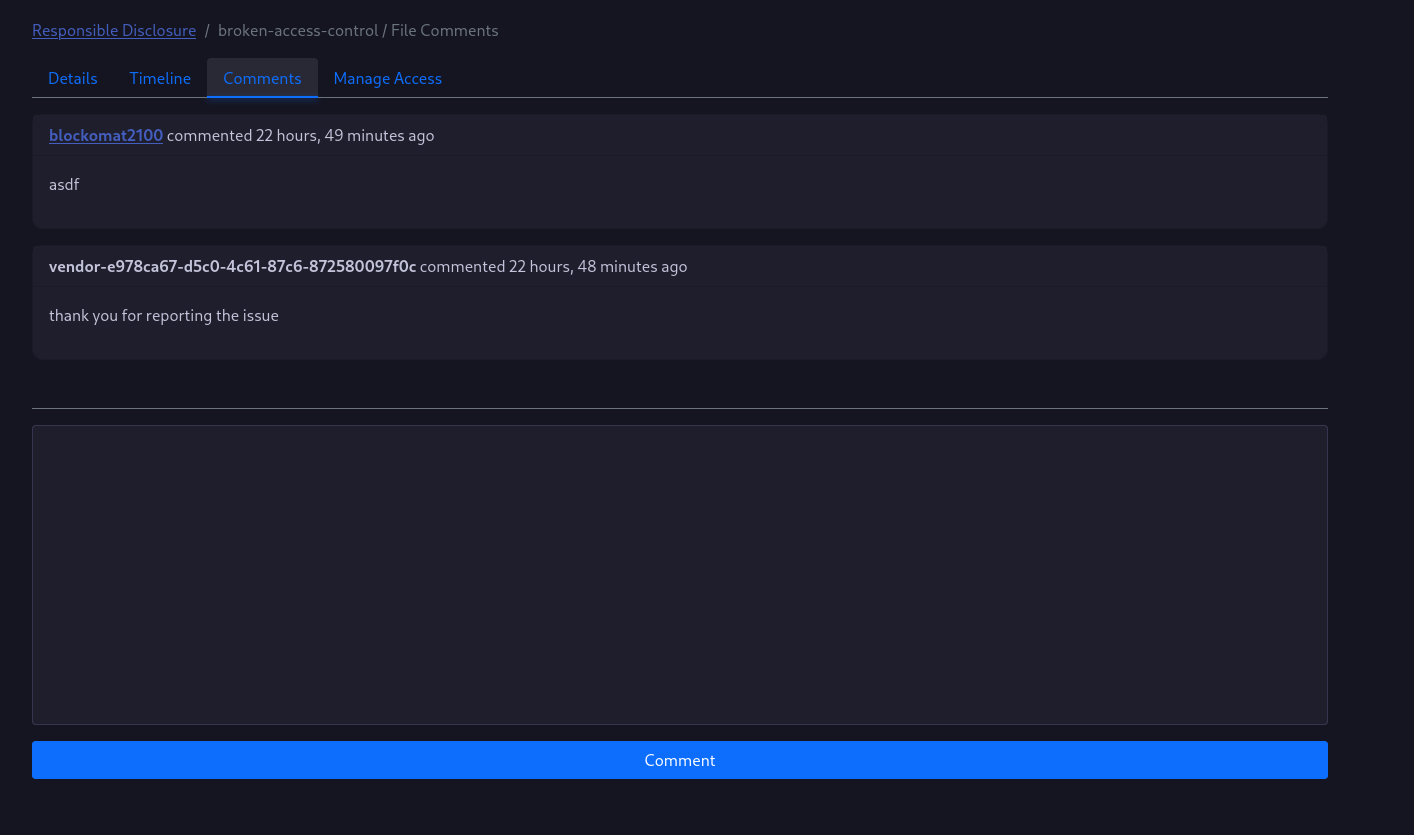
You can use markdown in the comments too.
Manage Access
To share the vulnerability with the vendor or other contributors you need the Manage Access page.
The pages shows who has access to the vulnerability details.
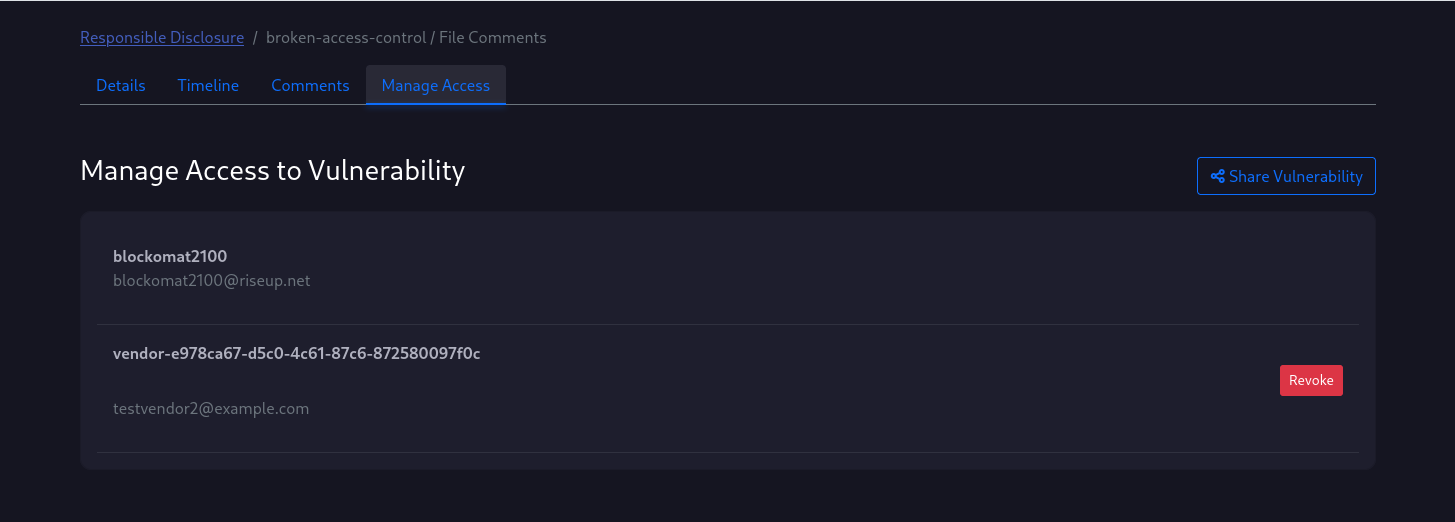
You can share the vulnerability by providing an email address. If this address already belongs to a vulnman user, he will be granted the corresponding permissions. Otherwise, an inactive user account will be created for the user with a random username. An invitation email will be sent to the email address to activate the account and set a password.
4 - Advanced Topics
4.1 - LDAP Authentication
In the first step, you need to install django-auth-ldap.
This can be done with pip.
pip install django-auth-ldap
Settings
Add the following lines to your local_settings.py file.
##############
# LDAP
# You need to install `django-auth-ldap` to use LDAP authentication
# See https://django-auth-ldap.readthedocs.io/en/latest/install.html for library usage
##############

import ldap
from django_auth_ldap.config import LDAPSearch, PosixGroupType

AUTH_LDAP_BIND_DN = "cn=admin,dc=example,dc=org"
AUTH_LDAP_BIND_PASSWORD = "admin"
AUTH_LDAP_USER_SEARCH = LDAPSearch(
    "ou=Users,dc=example,dc=org", ldap.SCOPE_SUBTREE, "(uid=%(user)s)"
)

AUTH_LDAP_FIND_GROUP_PERMS = True
AUTH_LDAP_CACHE_TIMEOUT = 3600
AUTH_LDAP_SERVER_URI = "ldap://172.17.0.2"

AUTH_LDAP_GROUP_TYPE = PosixGroupType(name_attr='cn')
AUTH_LDAP_GROUP_SEARCH = LDAPSearch(
    'ou=Groups,dc=example,dc=org',
    ldap.SCOPE_SUBTREE,
    '(objectClass=posixGroup)',
)

AUTH_LDAP_USER_ATTR_MAP = {
    "first_name": "givenName", "last_name": "sn",
    "email": "mail"
}
4.2 - Permissions in Vulnman
Vulnman comes with the following default roles and permission levels:
Roles
Pentesters- The members of the pentester group can be added to different projects. This will add permissions to the user to change, delete and view the project and its assets. Pentesters do not have permissions to add contributors to projects (except of the project creator). Pentesters are allowed to create new clients and create and invite their employees.
Vendors- A vendor is allowed to use the Responsible Disclosure application. The vendor is allowed to comment on shared vulnerabilities.
Customers- Customers are low privilged users. They can be added to projects.
Bughunters- Bughunters only have permissions to access the Responsible Disclosure application and manage vulnerabilities there. No permissions to projects are granted.
Project Contributor Roles
If a new contributor is added to a project the following roles are available.
Read Only- Contributors of this role are not allowed to change assets or other stuff belonging to the project.
Pentester- Pentesters are allowed to edit project related objects.
4.3 - Custom Report Templates
You can deploy your own report templates using a python package.
The default templates repository contains a full example of the layout of such a package. It should be noted, that the default report template is quite minimalistic, because you may use a custom one anyway.
Enable Report Template
To enable to the report template, add the following lines to your local_settings.py file.
# Report Templates
REPORT_TEMPLATES = {
    "default": 'vulnman_default_templates.report_templates.default_template',
    "my_report": 'my_package.report_templates.my_report'
}


ADDITIONAL_PACKAGES = [
    "my_package"
]
The setting above enables both, the default template and your custom one.
Stylesheets
The report generator will automatically check the existence of the scss/main.scss file in the report’s template directory.
If this file exists, the stylesheets are automatically used in your report template.
Template Context
You have the full power of the django templating engine in your report template.
Translations
Translation files are located in locale directory.
To create the required text files, run the following command:
django-admin makemessages -l de -i "venv*" -i "build*" -i "dist*" -i "my_package.egg-info*"
Replace de with your language code.
You can now edit the django.po file. If you are done, you need to run the following command:
django-admin compilemessages
4.4 - Vulnerability Templates
The Vulnman server relies on the existing vulnerability templates.
Since my current focus is on the core modules, the current templates are minimalistic and rather unsuitable for meaningful reports.
Feel free to contribute new vulnerability templates or improve existing ones.
Currently there is little to consider, and the creation is very simple.
Structure of Vulnerability Templates
First of all, the default community vulnerability templates repository is located here.
There are 3 required files for a vulnerability template:
- info.yaml: Contains meta data information of the template
- description.md: A description of the vulnerability written in markdown syntax
- resolution.md: A recommendation of how the vulnerability can be fixed. Also supports markdown syntax.
Vulnman supports multiple languages for report creation. This requires to have vulnerability templates in these languages.
The directory structure of a vulnerability template looks similar to the one below:
| - my_vulnerability
  | - info.yaml
  | - locale
    | - en
      | - description.md
      | - recommendation.md
    | - de
      | - description.md
      | - recommendation.md
info.yaml template
- id: cross-site-scripting
  name: Cross-Site Scripting
  severity: critical
  references:
    - "https://owasp.org/www-community/attacks/xss/"
  cwe:
    - CWE-79
  categories:
    - input-validation
  locale:
    en:
      name: Cross-Site Scripting
    de:
      name: Cross-Site Scripting
5 - Contribution Guidelines
Thank you for your interest in contributing to vulnman! Here are some of the many ways in which you can help:
5.1 - Project Security
This page provides a central hub for topics pertaining to the security of the vulnman project.
Reporting security issues in Vulnman
If you have discovered a security issue affecting vulnman, then we would be more than happy to hear from you!
If our investigation confirms that an issue affects vulnman, we will patch it within a reasonable time and release a public post that describes the issue, discusses the potential impact of the vulnerability, references applicable patches or workarounds, and credits the discoverer. Please use this address:
vulnman-project+security at riseup dot net
5.2 - Testing Releases
Testing new vulnman releases and updates is one of the most helpful ways in which you can contribute to the vulnman project.
Warning: Software testing is intended for advanced users and developers. You should only attempt to do this if you know what you’re doing. Never rely on code that is in testing for critical work!
The Main Branch
The main branch is used for development purposes and should not be used for critical work. If you want to test upcoming releases, download the code from the main branch.
If you are using docker, use the main tag, which is build on every commit in the main branch.
Providing feedback
Since the whole point of testing software is to discover and fix bugs, your feedback is an essential part of this process.
5.3 - How To Edit The Documentation
To Be Done