To Be Done
This is the multi-page printable view of this section. Click here to print.
User Guide
Examples and Tutorials of how you can use vulnman
1 - Introducing the Web Interface
The web interface allows you to manage your pentest and its assets using a user interface.
You can visit the vulnman server by opening your instance from within your browser. The application needs you to be logged in.
After you logged in, you will be redirected to the list of your current (non archived) projects. By clicking on one of the projects, you are able to activate the project and see its details and do your work.
Project Dashboard
The project dashboard is the home of your project. It gives you a short overview about the state of your project.

It contains the remaining time for the project, different counts like how many vulnerabilities were found and open to dos are left.
You can close the project through the X button.
Closing a project makes it read-only.
If for some reasons you forgot your role in the project, you can found it here - in the top left of the dashboard.
A sidebar will be available with project related actions.
The Sidebar
The sidebar only contains project related links, while the top bar include global links. The sidebar is devided into different categories.
Pentest:
The pentest group contains links to your project’s dashboard, vulnerabilities, tasks, user accounts and project tokens.
Assets:
In this group you can create and manage your assets.
Management:
This group handels links to manage the project. Currently there is just one item in here, which allows you to add or remove contributors. It is important to know, that you need permissions to do so. By default, the project creator user will be able to remove or add contributors.
Reporting:
Here you can create new reports or download existing one. You can write the management summary here.
2 - Generate Reports
The reports in vulnman are generated from templates.
A simple default template is included, but you may want to customize it to make it yours. The default template is quite minimalistic, since in most cases a custom one would be used anyway.
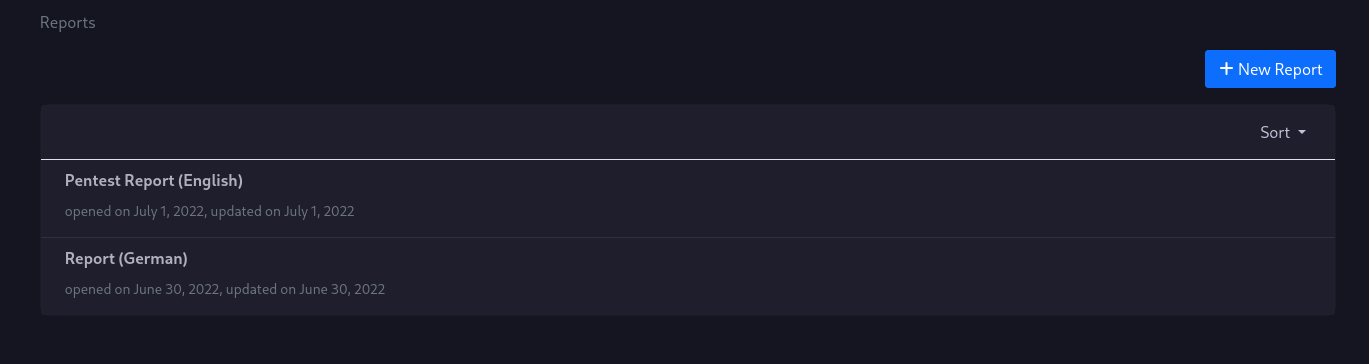
Report List
You can have multiple reports for your projects, in case your customer wants to have for example an english, and a german report.
New Reports
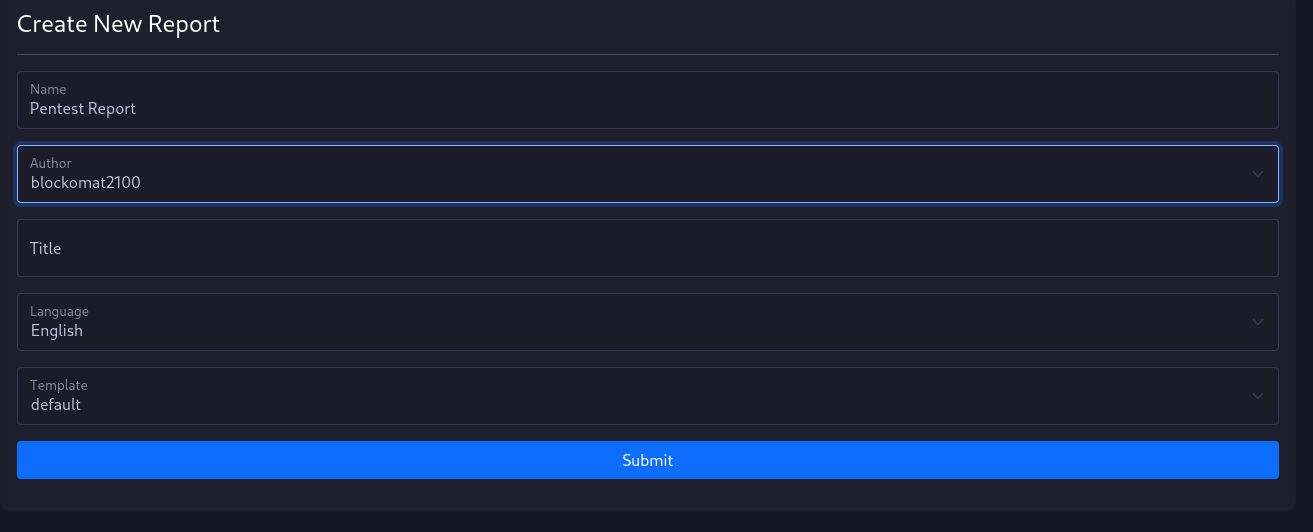
To create a new report, you need to give vulnman some information about the report.
The name is just for internal purposes and is displayed in the report list.
The author of the report is displayed in the report.
The title field is optional and can be used to overwrite the default report title.
You can also choose a report template and language.
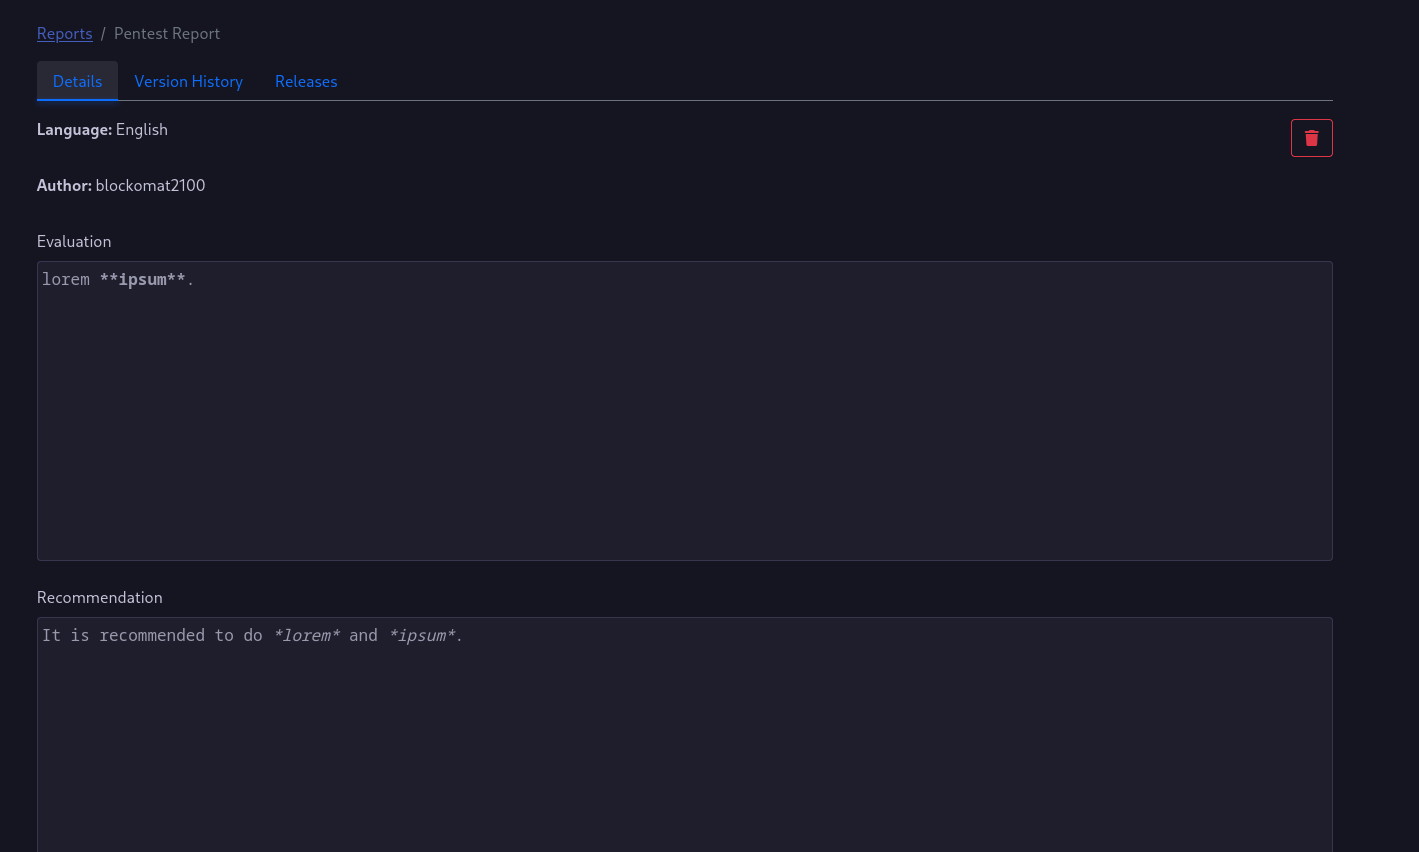
The Report
The report requires you to write a management summary using the Evaluation and Recommendation fields.
Both fields will send a request to the API once you remove the focus of the fields and the content will be stored in the database.
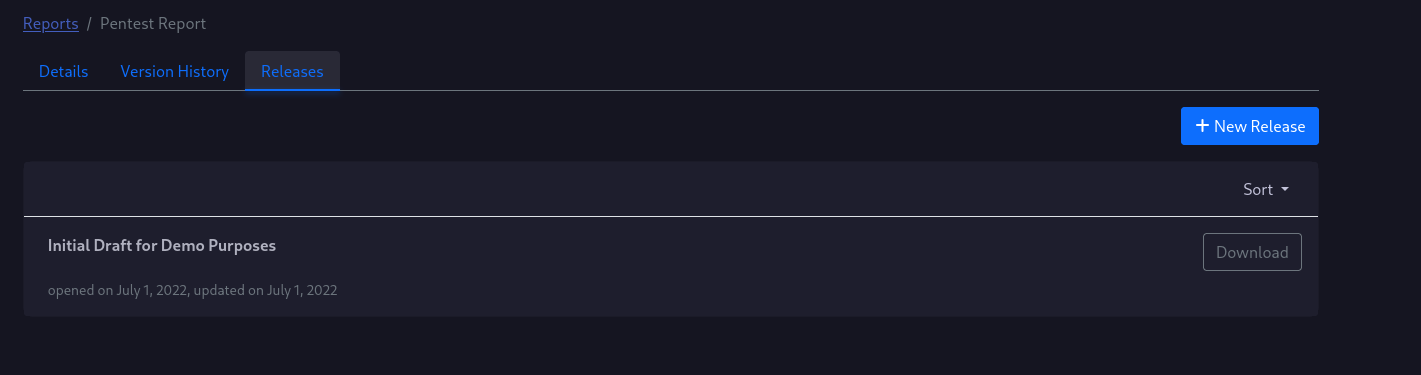
Report Releases
A report release is a fixed state of the report. Once you create a report release the report generator will use the most current information and generates the report. If you add new vulnerabilities or edit the management summary, you need to create a new report release.
Note: There is currently no status indicator of the build process. Depending on the project size, the generation may need some time.
After the report is created, you can click the download button to receive the generated PDF report.
Report releases can have different types.
The draft contains a watermark which indicates, that this report is actually a draft report.
The release does not have a watermark.
3 - Using The Responsible Disclosure Application
Your instance must have the responsible disclosure application feature enabled, otherwise it will not be accessible for you.
Vulnerability Listing
Visiting the Responsible Disclosure Application opens up your list of vulnerabilities.
This list contains all vulnerabilities that you have created or that have been shared with you.
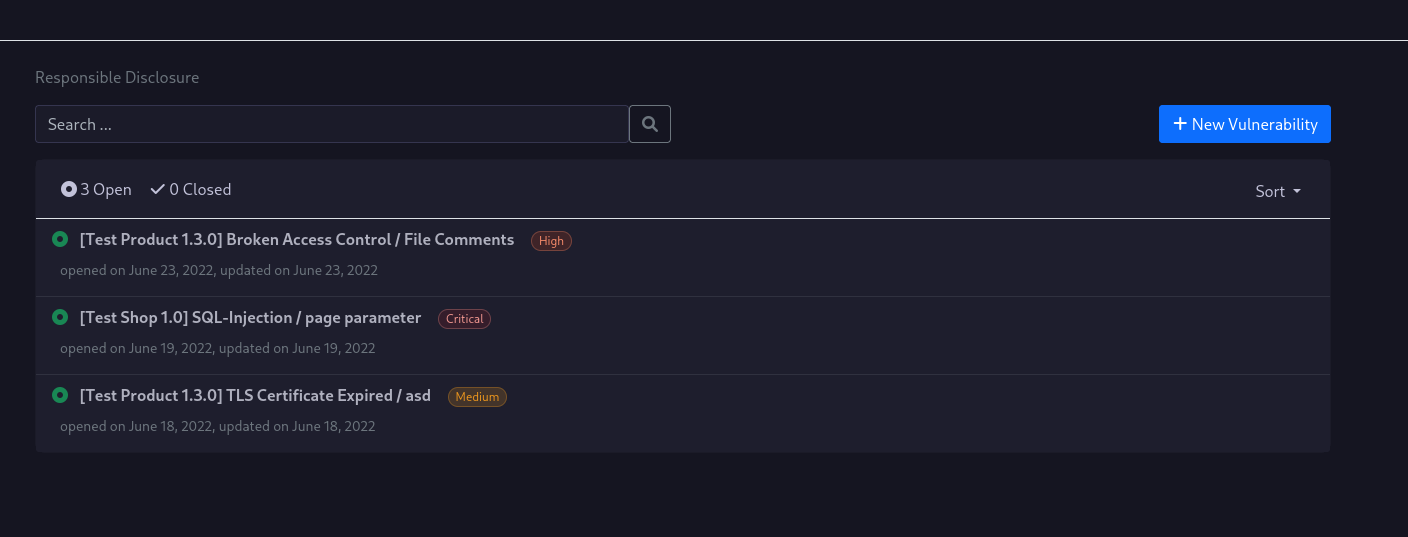
The default view is to show only open findings, while you can easily view closed ones by clicking the corresponding button.
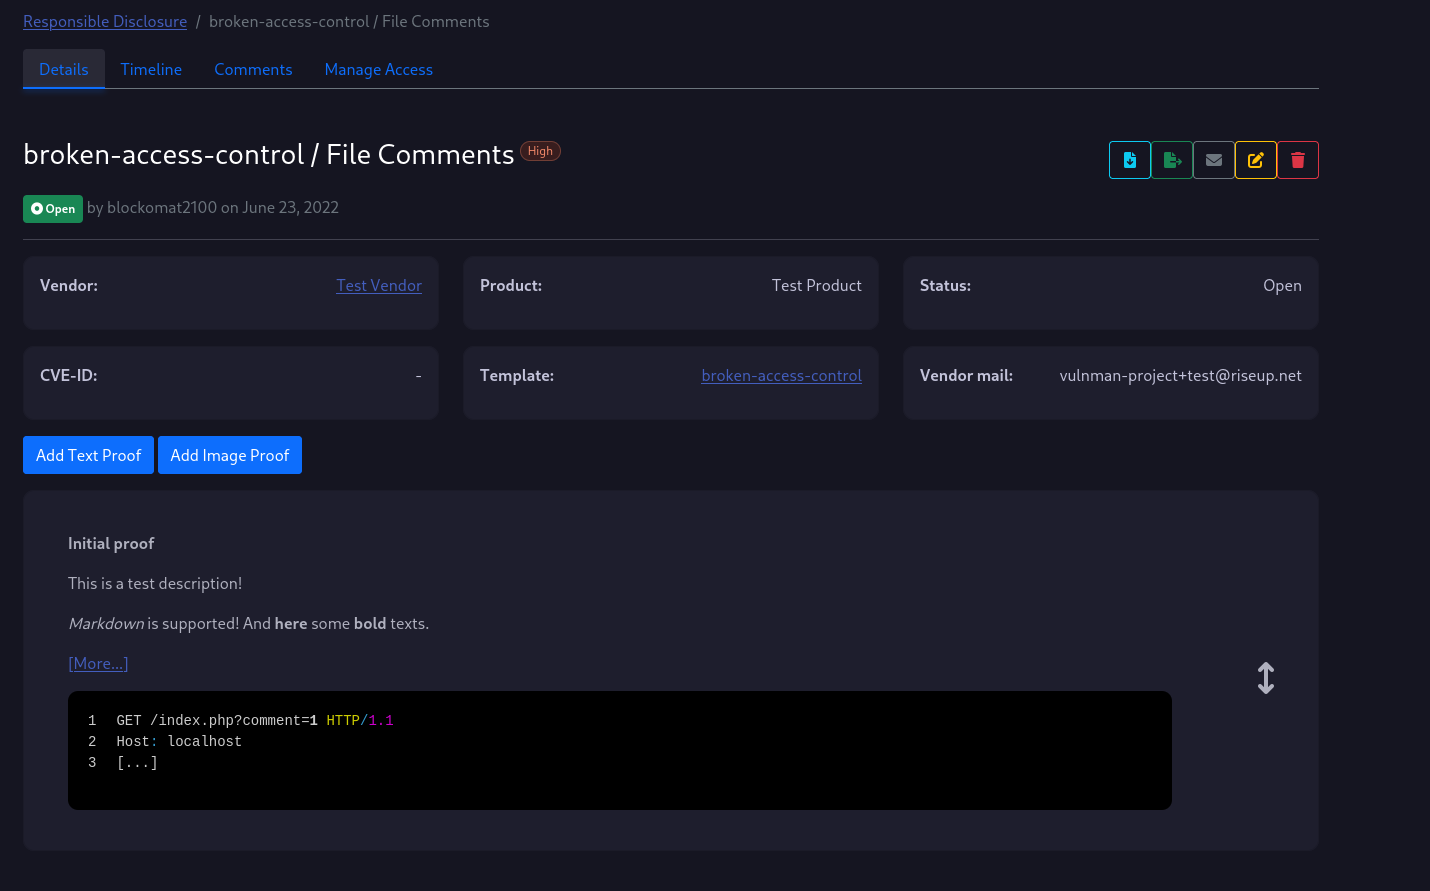
Vulnerability Details
If you click on one of the vulnerabilities in your list, you will see a screen similiar to the one below.
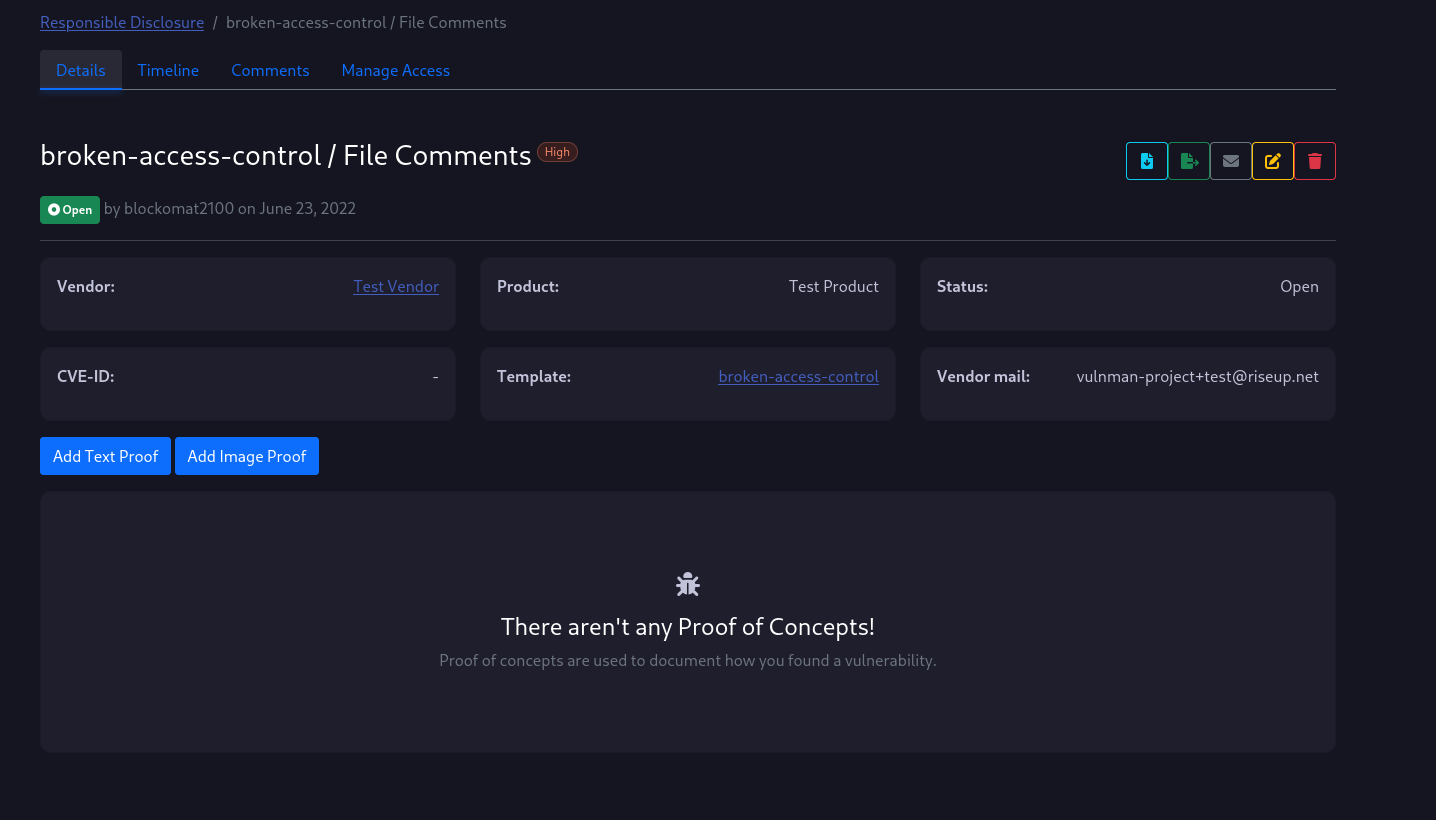
A second navigatation bar appears which contains pages related to the vulnerability including a disclosure timeline, comments and access management.
If you have permissions to change the vulnerability you will find some buttons on the right to manage the vulnerability.
The buttons have the following functionality (from left to right):
- Download the vulnerability details as a PDF report
- Export the vulnerability details as a Markdown advisory
- Notify vendor by mail, with PDF report attached (Warning: The mail will be send unencrypted. PGP or other encryption is not yet supported!)
- Edit the vulnerability details
- Delete the vulnerability
In the bottom half of the page, you see two more buttons for adding new proofs to the vulnerability.
Proofs
To create a new proof, just click on one of the buttons.
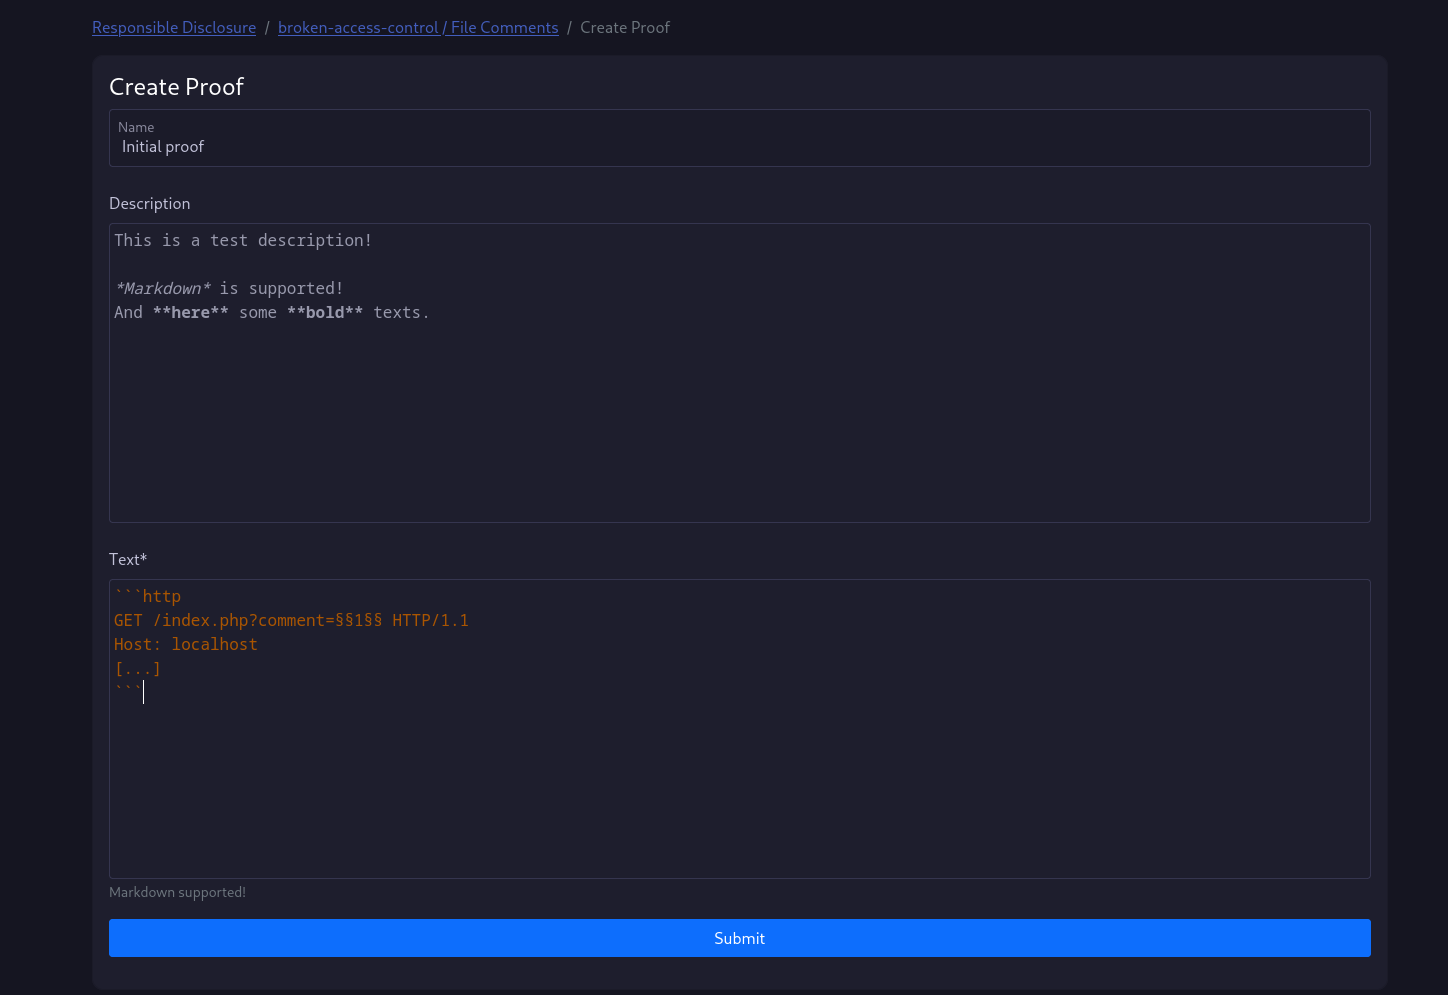
As you can see in the screenshot, you can use markdown.
You can highlight specific parts of a codeblock with §§highlighted$$.
If you have created the proof, the proof will appear on the vulnerability details page as shown below.
Timeline
The timeline allows you and the vendor to track the process of the disclosure process.
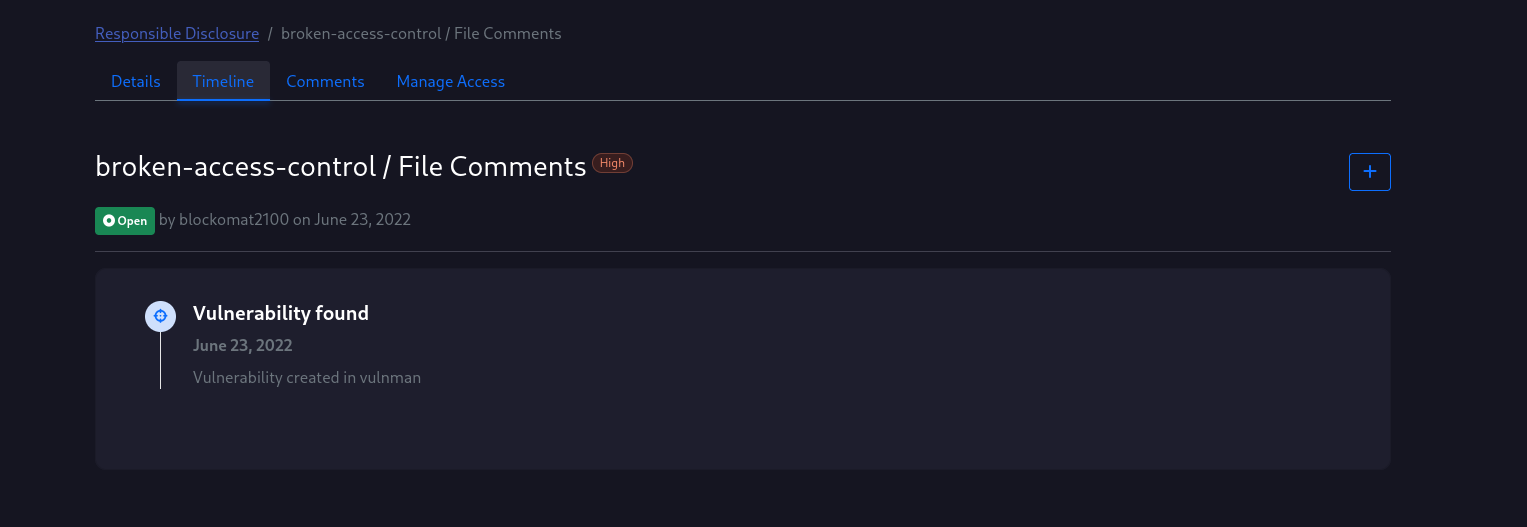
You can create new events using the button on the right corner.
Comments
If you shared the vulnerability with a user, you can use the comment feature to discuss further things about the disclosure process.
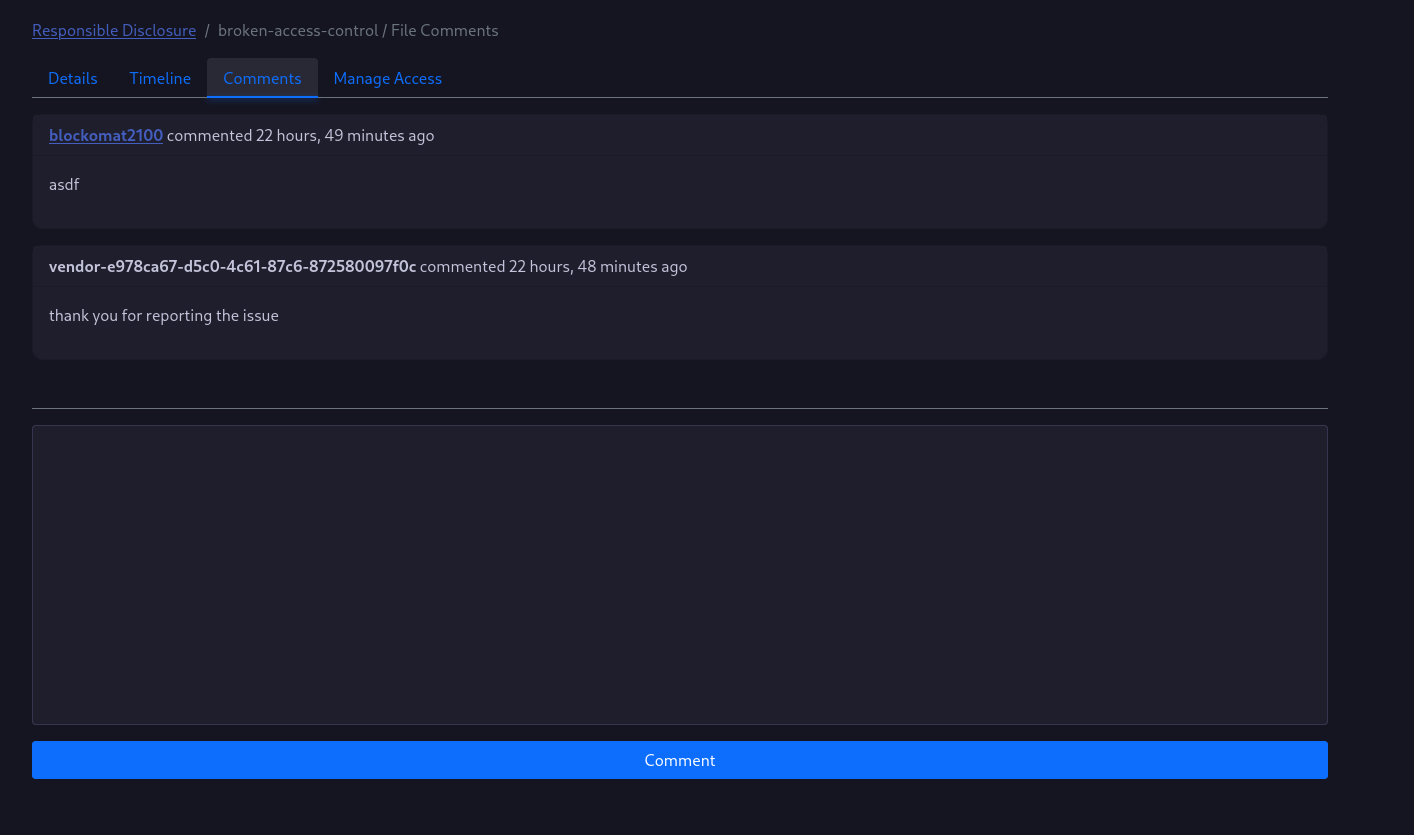
You can use markdown in the comments too.
Manage Access
To share the vulnerability with the vendor or other contributors you need the Manage Access page.
The pages shows who has access to the vulnerability details.
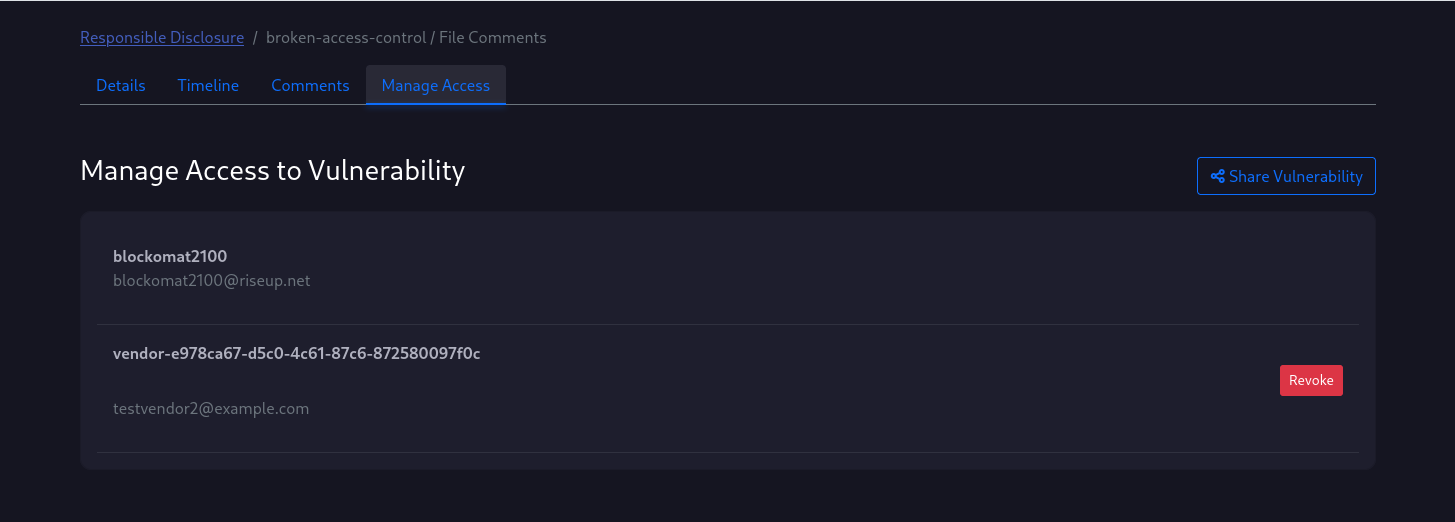
You can share the vulnerability by providing an email address. If this address already belongs to a vulnman user, he will be granted the corresponding permissions. Otherwise, an inactive user account will be created for the user with a random username. An invitation email will be sent to the email address to activate the account and set a password.